Common PPF Installation Mistakes and How Professionals Avoid Them
Your vehicle represents more than transportation—it's an investment in quality, performance, and personal pride. When considering Paint Protection Film (PPF) installation, the difference between amateur application and professional expertise can mean the difference between flawless protection and costly disappointment. At JL's Showroom Auto Salon, we've witnessed countless DIY attempts that end in frustration, damaged film, and compromised paint protection. Understanding these common pitfalls and the professional techniques that prevent them ensures your investment delivers the mirror-like finish and long-term protection you expect.
Professional PPF installation requires meticulous surface preparation, precise alignment techniques, and controlled environmental conditions. Expert installers prevent common failures through systematic decontamination processes, temperature-controlled application environments, and specialized tools that ensure bubble-free, seamless protection lasting years beyond amateur attempts.
Critical Preparation: The Foundation of Flawless PPF
The difference between professional-grade PPF installation and amateur attempts begins long before film touches paint. Industry data reveals that inadequate preparation increases defect rates by up to 50%—a statistic that underscores why discerning vehicle owners trust certified professionals rather than risk DIY applications.
Surface Decontamination Excellence
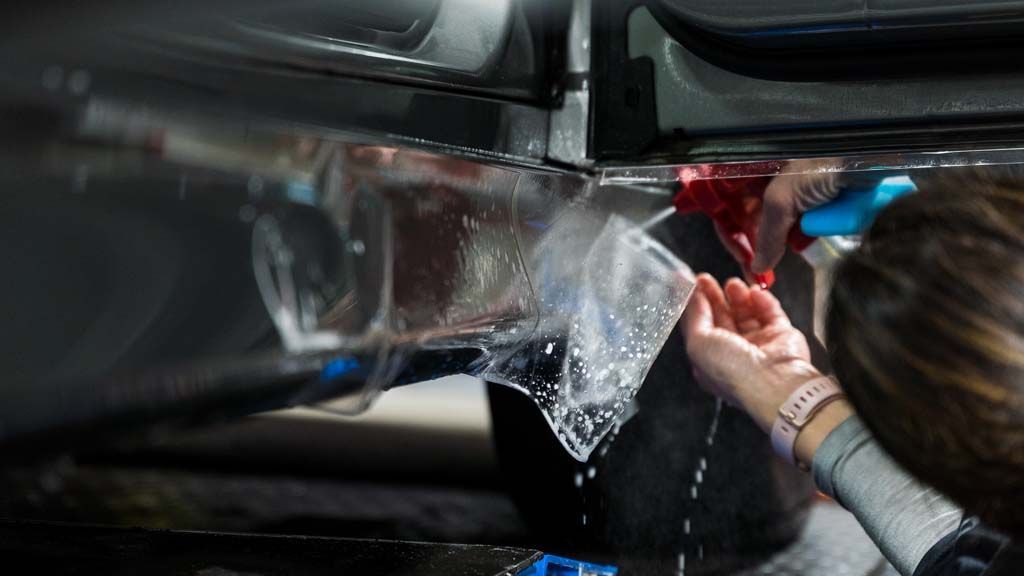
Professional PPF installation demands forensic-level cleanliness. Microscopic contaminants invisible to the naked eye—rail dust, industrial fallout, embedded tree sap—create adhesion failures that manifest as bubbles, lifting edges, or premature yellowing. These imperfections don't just compromise aesthetics; they void manufacturer warranties and necessitate complete reinstallation.
Our certified technicians employ a three-stage decontamination protocol that exceeds industry standards:
Stage 1: Premium Wash Process We begin with pH-neutral, automotive-specific cleansers that dissolve road film without stripping existing protection. This isn't your typical driveway wash—our two-bucket method with grit guards prevents cross-contamination that creates micro-marring.
Stage 2: Mechanical Decontamination Professional-grade clay bars remove bonded contaminants that chemical washing cannot address. This tactile process requires experienced hands to identify and eliminate surface irregularities that would telegraph through the film.
Stage 3: Chemical Purification A final isopropyl alcohol solution removes any remaining oils, waxes, or residues. This creates the chemically clean surface essential for maximum adhesive bonding.
Installation Precision: Where Expertise Shows
The application phase reveals the gulf between professional certification and YouTube tutorials. Every vehicle presents unique challenges—complex bumper geometries, mirror housings, door handle recesses—that demand years of experience to navigate successfully.
Alignment Mastery
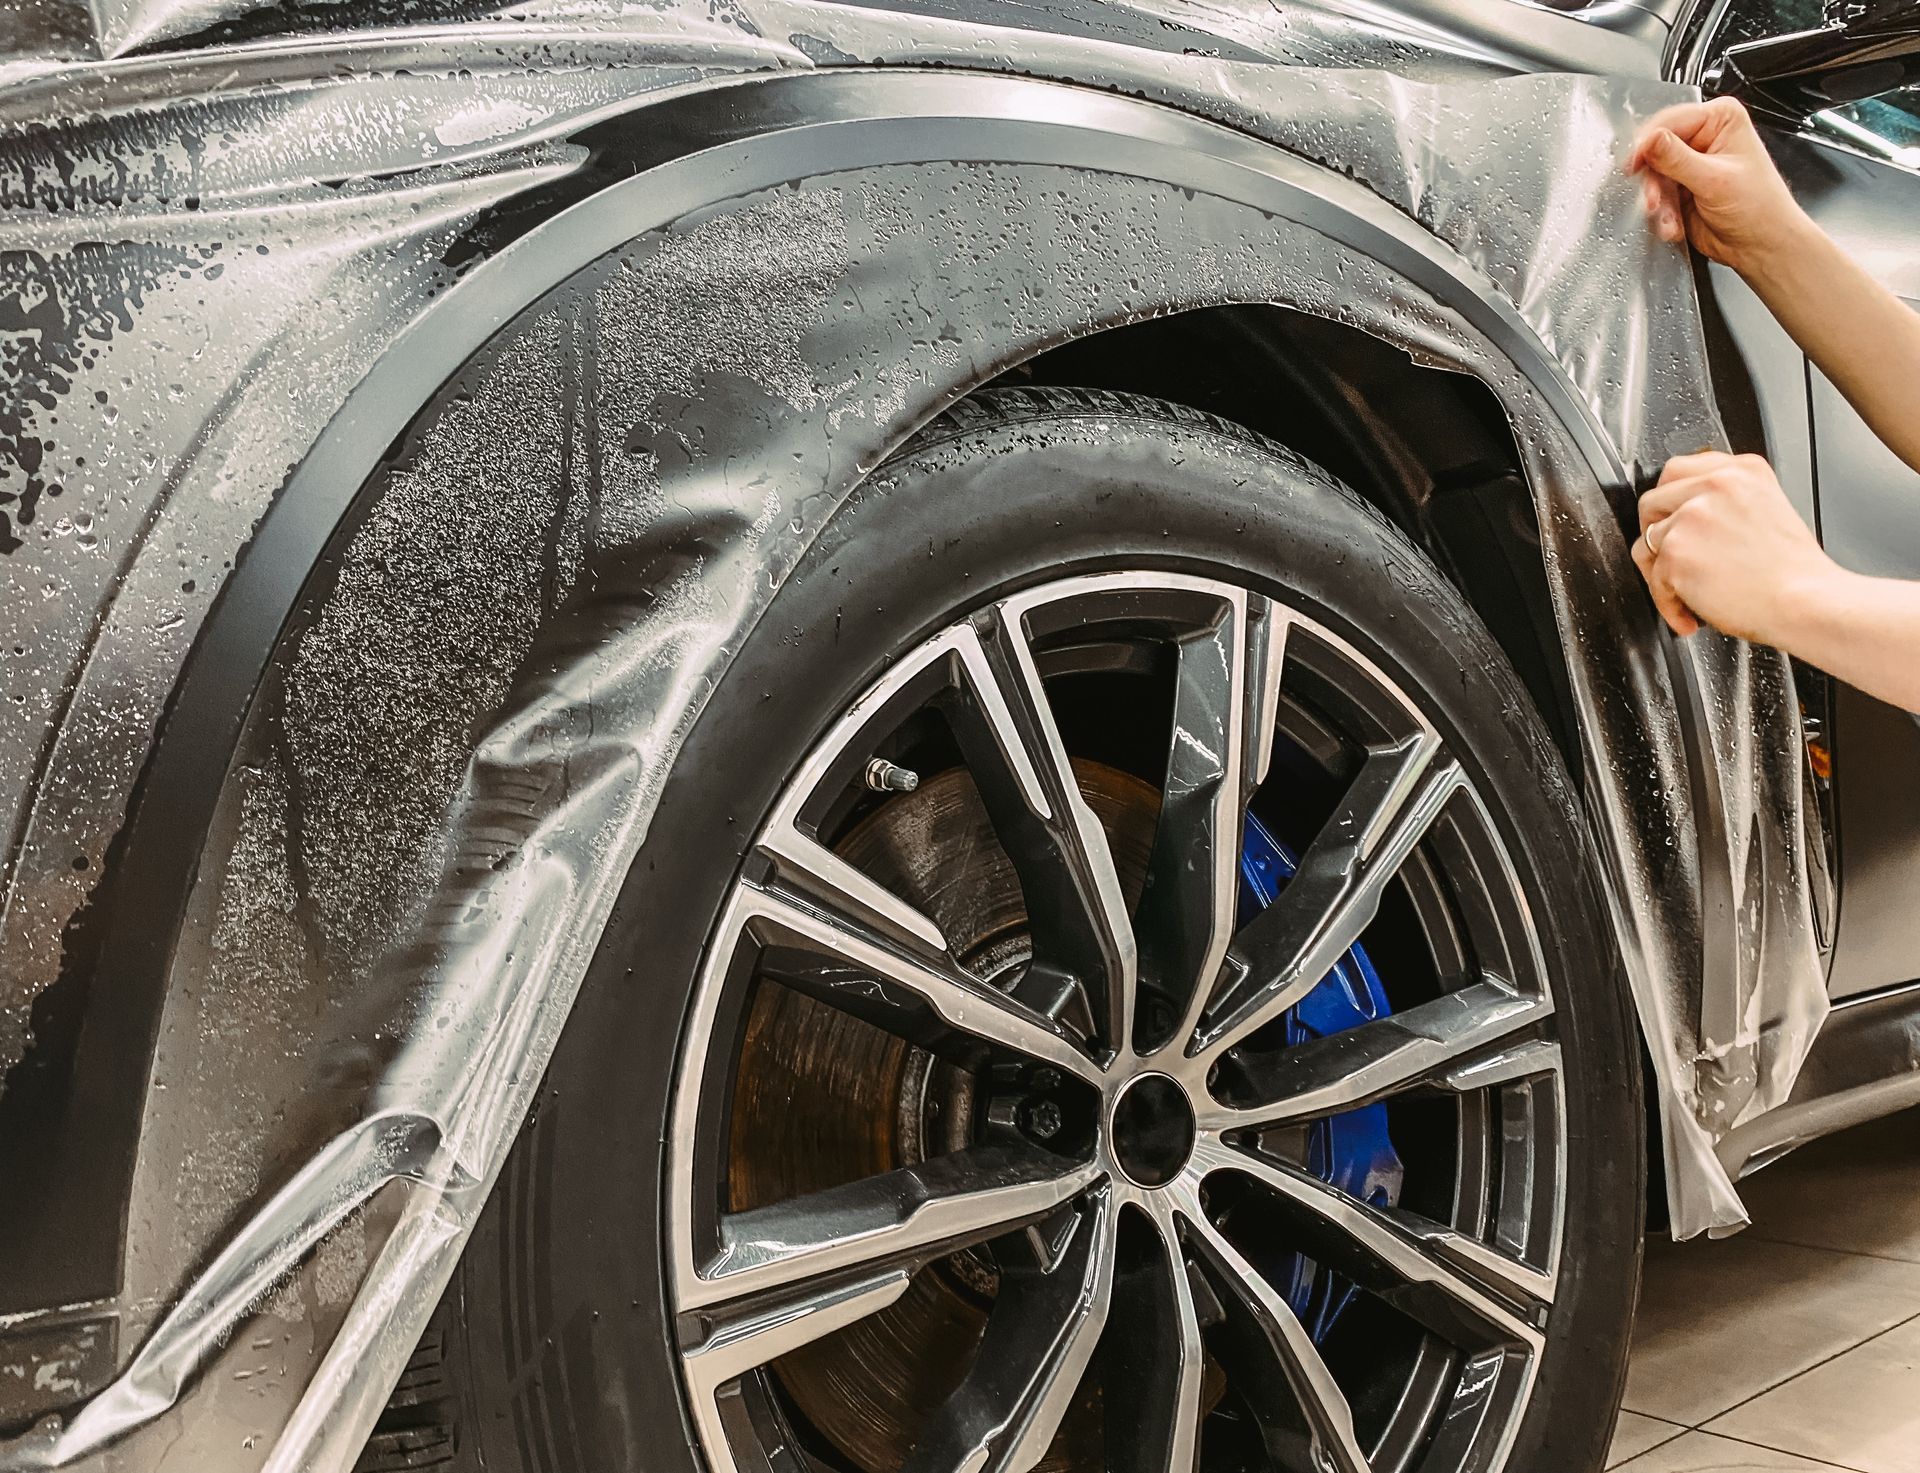
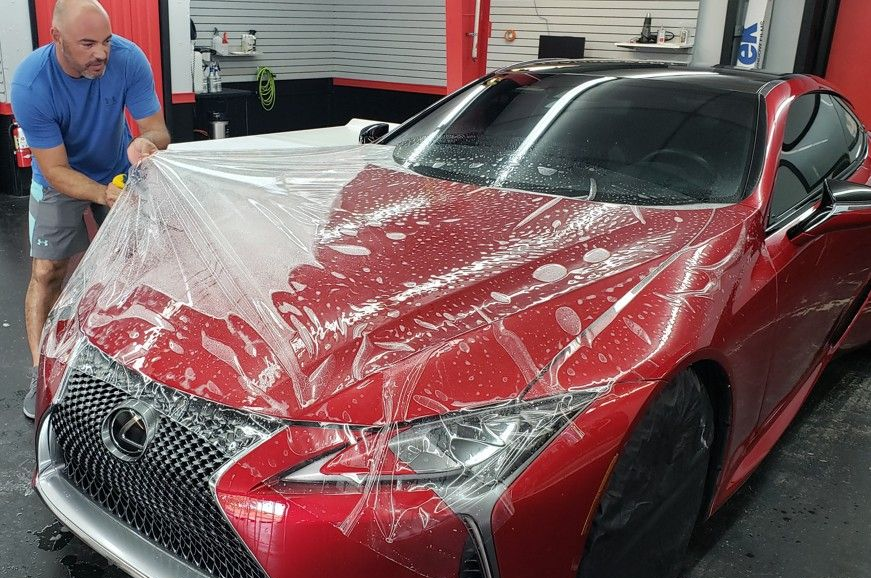
Misalignment remains the most visible indicator of amateur installation. Gaps expose paint to the very damage PPF should prevent, while overlaps create unsightly ridges that trap moisture and debris. Professional installers employ digital pattern cutting systems and pre-cut templates that ensure millimeter-perfect coverage.
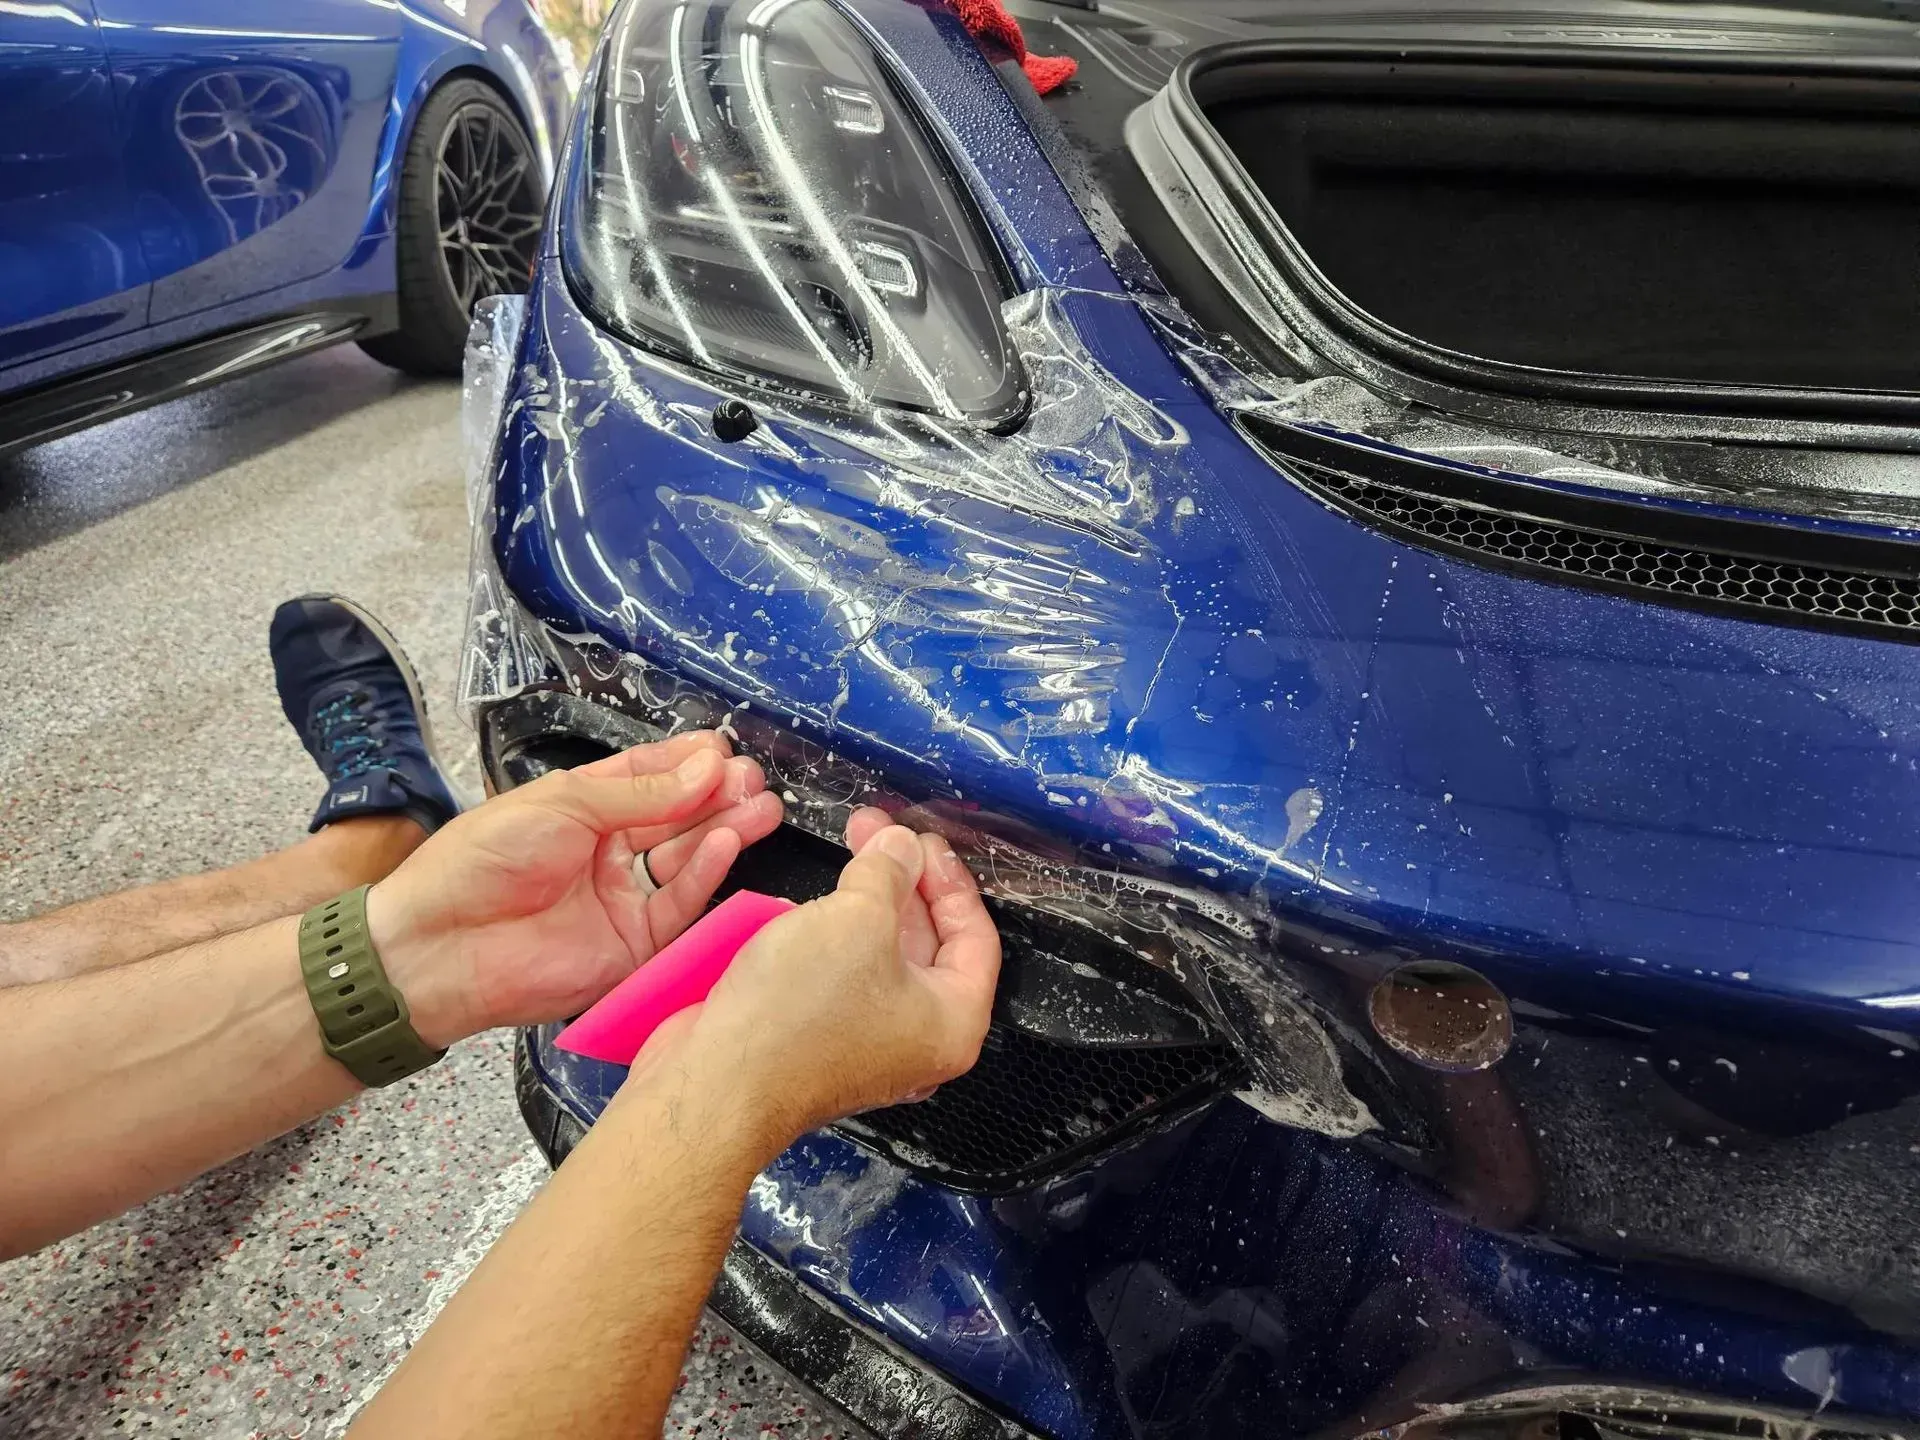
Our technicians utilize slip solutions—carefully formulated lubricants that allow precise positioning before final adhesion. This isn't simple soap and water; professional solutions are pH-balanced to work with specific film chemistries, preventing premature bonding while ensuring ultimate adhesion strength.
Strategic oversizing followed by precision trimming ensures complete coverage of vulnerable edges—areas where rock chips most commonly occur. Amateur installers often undercut edges to ease installation, leaving the most critical areas exposed.
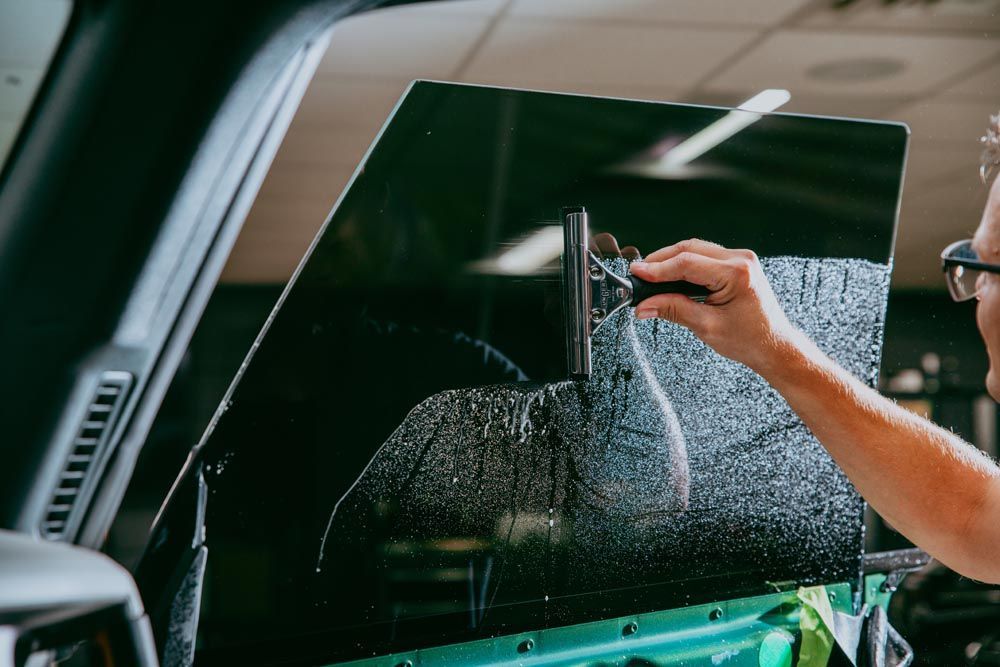
Eliminating Air Entrapment
Air bubbles destroy both aesthetics and protection efficacy. They create stress points where film can tear, allow moisture infiltration that causes adhesive failure, and signal amateur workmanship to anyone who examines your vehicle.
Professional squeegee technique—developed through thousands of installations—eliminates air entrapment through systematic pressure application. Starting from the center and working outward in overlapping strokes, experts maintain consistent pressure that evacuates air while avoiding film distortion.
The tools matter: professional-grade squeegees feature varied durometer ratings for different film areas. Hard squeegees remove bulk water, while softer variants conform to curves without creating pressure points. Amateur attempts with improvised tools invariably create the very problems they're trying to solve.
Advanced Techniques: The Professional Advantage
Beyond basic application, professional installers employ advanced techniques that ensure longevity and performance amateur installations cannot match.
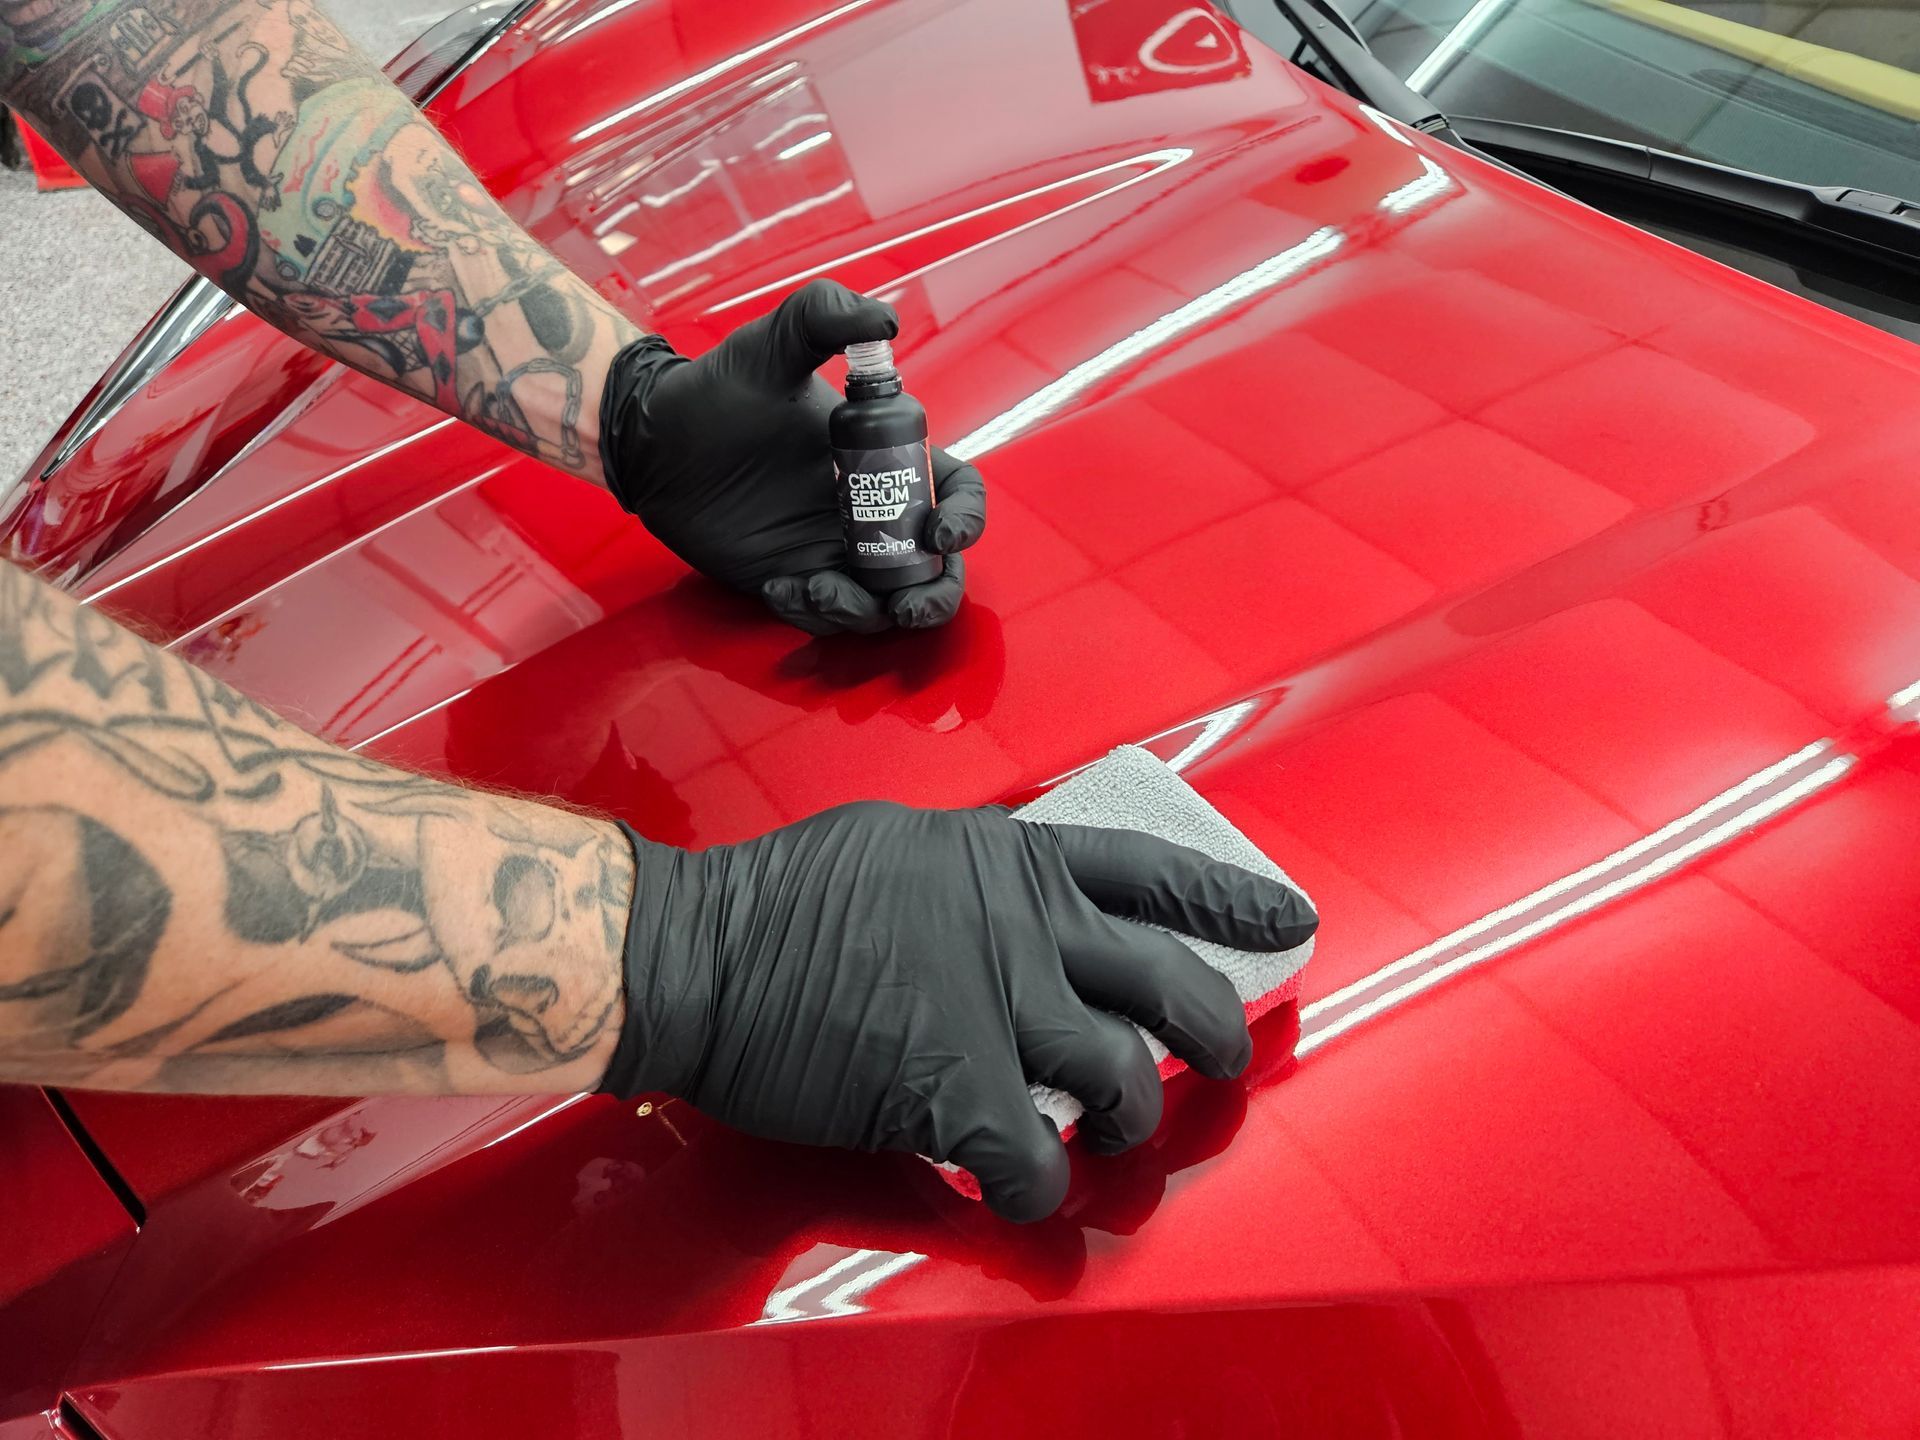
Custom Solution Formulation
Professional installers customize slip solutions based on ambient conditions, film type, and specific vehicle challenges. Higher soap concentrations aid complex installations, while minimal lubrication ensures rapid bonding on flat panels. This adaptive approach—impossible without extensive experience—optimizes every installation phase.
Heat Management Expertise
Strategic heat application transforms PPF installation from struggle to art. Professionals use variable-temperature heat guns to:
- Pre-stretch film for complex curves without thinning
- Post-heat edges for maximum adhesion
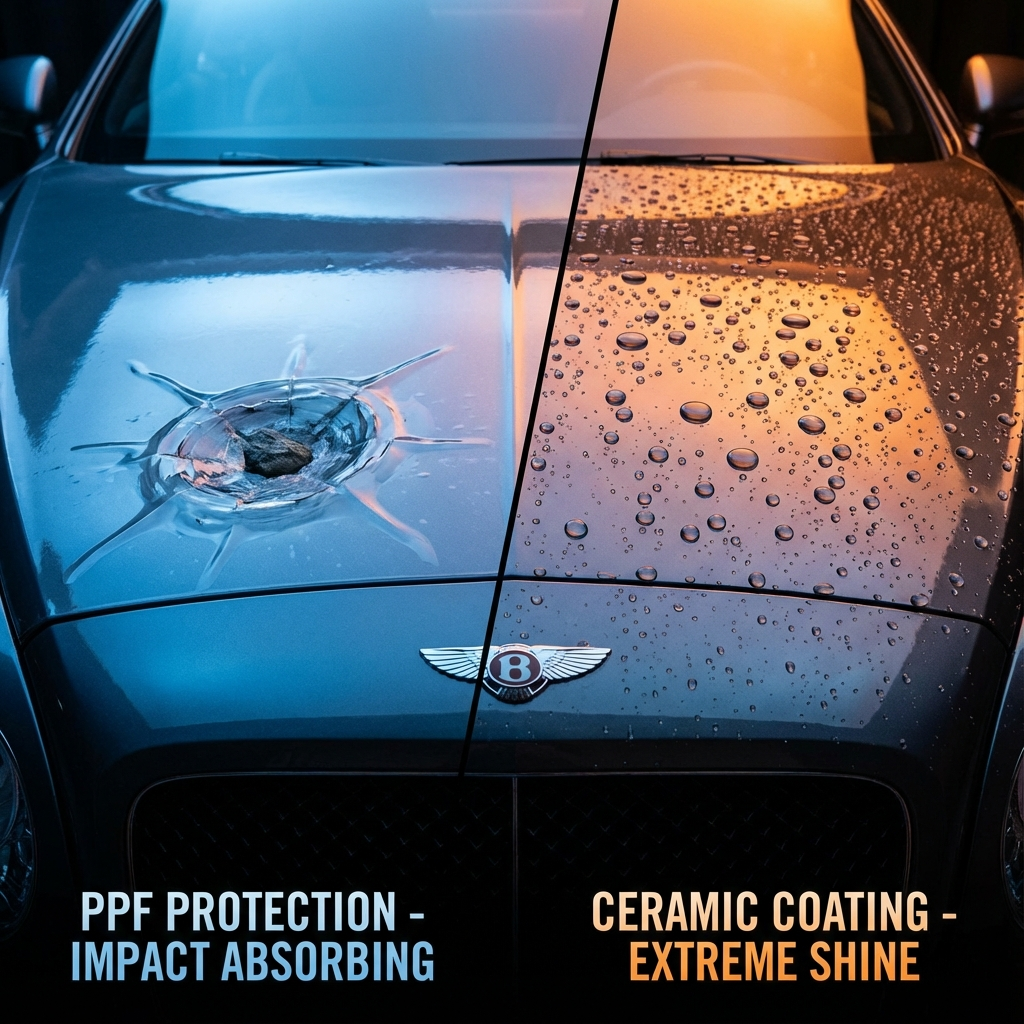
- Activate self-healing properties in premium films
- Accelerate curing in specific zones
Amateur heat gun use often causes irreversible damage—overheating creates film distortion, adhesive failure, and potential paint damage. Professional training includes understanding film-specific temperature tolerances and visual indicators of proper activation.
Post-Installation Excellence: Ensuring Long-Term Success
The installation's conclusion marks the beginning of the curing phase—a critical period that determines long-term performance. Professional installations include detailed post-installation protocols that maximize film longevity.
Controlled Curing Environment
PPF requires 24-48 hours of undisturbed curing for optimal adhesion. During this period, temperature stability and protection from moisture are essential. Professional facilities provide climate-controlled curing bays that maintain ideal conditions regardless of weather.
Amateur installations often rush this phase, exposing vehicles to rain, temperature extremes, or premature washing. These mistakes cause edge lifting, water spotting beneath film, and adhesive failure that becomes apparent weeks after installation.
Professional Inspection Protocols
Certified installers perform systematic post-installation inspections using specialized lighting to identify any imperfections invisible under normal conditions. Minor adjustments during the curing window prevent issues that would otherwise require complete reinstallation.
Quality Differentiators: Why Professional Installation Matters
The gap between professional and amateur PPF installation extends beyond technique to encompass materials, warranties, and long-term support.
Premium Material Access
Professional installers maintain relationships with top-tier manufacturers like SunTek or other major brands - accessing premium films unavailable to consumers. These professional-grade materials offer superior clarity, self-healing properties, and warranty coverage that retail films cannot match.
Comprehensive Warranty Protection
Professional installation includes manufacturer-backed warranties covering both materials and workmanship. These warranties—often extending 3+ years—protect your investment against yellowing, cracking, peeling, and adhesive failure. DIY installations void manufacturer warranties, leaving you exposed to replacement costs.
Ongoing Support and Maintenance
Professional relationships don't end at installation. Certified installers provide maintenance guidance, perform warranty inspections, and address any concerns throughout ownership. This ongoing support ensures your PPF maintains peak performance and appearance for years.
Common DIY Pitfalls and Professional Solutions
Understanding typical amateur mistakes reinforces the value of professional installation:
Pitfall: Contamination Under Film
- Amateur approach: Attempting installation in dusty garages or driveways
- Professional solution: HEPA-filtered clean rooms with positive air pressure
Pitfall: Premature Edge Failure
- Amateur approach: Insufficient edge sealing and corner wrapping
- Professional solution: Edge-sealing techniques with specialized primers
Pitfall: Visible Seams and Overlaps
- Amateur approach: Poor pattern layout and cutting
- Professional solution: Computer-cut patterns with strategic seam placement
Pitfall: Stretch Marks and Distortion
- Amateur approach: Overstretching film to cover large areas
- Professional solution: Multi-piece installation with invisible seams

Investment Protection Through Professional Excellence
Your vehicle deserves protection that matches your standards for quality and performance. While DIY PPF installation might seem cost-effective initially, the risks—damaged paint, wasted materials, compromised protection—far exceed any perceived savings.
At JL's Showroom Auto Salon, our certified PPF specialists combine technical expertise with genuine passion for automotive excellence. We understand that your vehicle represents more than transportation; it embodies your appreciation for quality, performance, and aesthetic perfection.
Transform your vehicle's protection today. Schedule your professional PPF consultation and discover why Melbourne's most discerning auto enthusiasts trust their investments to our expertise. Call us or visit our showroom to experience the difference professional installation makes.
Frequently Asked Questions
What techniques ensure professional-grade PPF adhesion?
Certified installers employ systematic surface preparation including chemical decontamination, mechanical clay bar treatment, and isopropyl alcohol purification. Combined with climate-controlled environments and professional-grade tools, these techniques ensure adhesion that exceeds manufacturer specifications and delivers 3+ year durability.
How do temperature and humidity affect PPF installation quality?
Optimal PPF installation requires 70°F to 80°F temperatures with 30-50% humidity. Variations outside these parameters cause adhesive irregularities, film rigidity, and curing failures. Professional facilities maintain controlled environments ensuring consistent results impossible with outdoor or garage installations.
Can PPF installation errors be corrected after application?
Minor issues addressed within 24-48 hours during the curing window can often be corrected. However, contamination under film, severe misalignment, or adhesive failure typically require complete removal and reinstallation—emphasizing the importance of professional installation from the start.
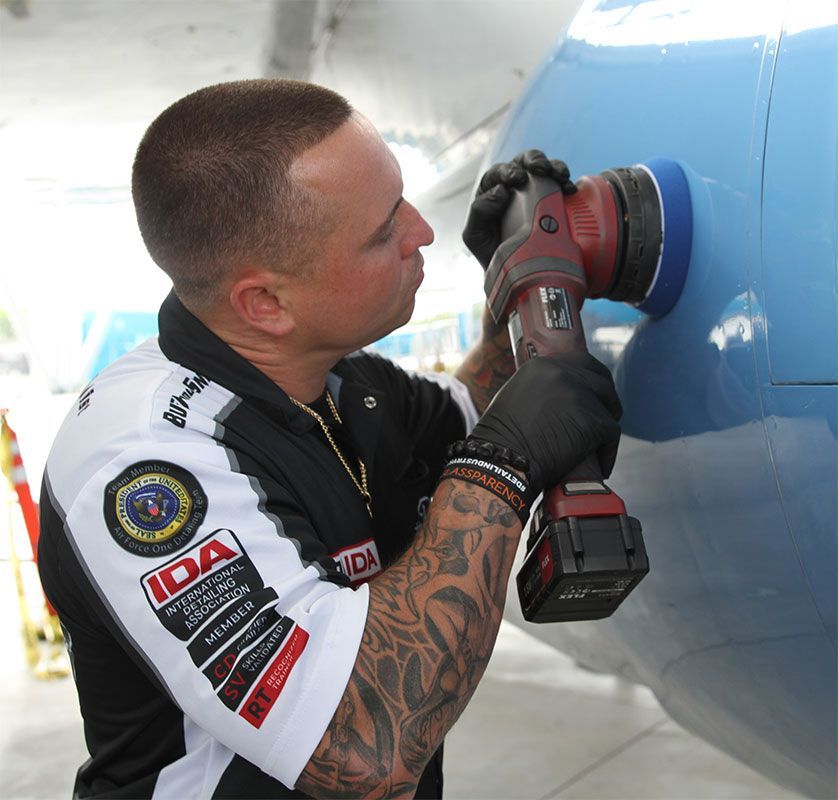
Which tools distinguish professional from amateur PPF installation?
Professional installations utilize specialized equipment including plotter cutters for precise patterns, variable-temperature heat guns, multiple durometer squeegees, and commercial-grade slip solutions.